甚麼是JAAS可以參考一下JWorld@TW及Oracle Jaas,在進行專案開發時,基本上人員權限一定是考量進去的,這次來介紹一下如何在Glassfish專案中設定 jdbc realm的方式進行。
既然是jdbc當然要先規劃一下db schema,有三個資料表要建立,user(人員資料表)、role(角色群組表)、userrolemapping(人員角色對應表),user資料表內要有帳號(username)及密碼(password),role資料表角色代號(role_code),userrolemapping資料表帳號(username)及角色代號(role_code)對應,這裡我會建議設計一個view比較方便:
SELECT user.username, user.password, role.role_code
FROM user, role, userrolemapping
WHERE user.username = userrolemapping.username AND role.role_code= userrolemapping.role_code;
若是JPA當然就用Id囉,
SELECT user.username, user.password, role.role_code
FROM user, role, userrolemapping
WHERE user.id= userrolemapping.user_id AND role.id= userrolemapping.role_id;
啟動Glassfis並進入admin console
http://localhost:4848
資源類型:javax.sql.DataSource
資料庫驅動程式供應商:這裡使用Postgresql,就選Postgresql Driver。
按下Next

 輸入以下特性,並按下確定。
 可以測試是否設定正確,按下Ping進行測試。

池名稱:剛剛建立的Pool名稱即可。
輸入完畢後按下確定。


JAAS環境:jdbcRealm,這要注意就是jdbcRealm大小寫要一模一樣。
JNDI:jdbc/test,剛剛設定的JDBC名稱。主要用於連接資料庫使用。
使用表格名稱:view table名稱。
使用者名稱欄:username
密碼欄:password
群組表格:view table名稱。
群組名稱欄:role
摘要演算法:MD5,這裡要注意一下,Default為SHA-256,並注意資料表中密碼欄位請以MD5方式儲存,參考程式如下:
public String encoderByMd5(String str) throws UnsupportedEncodingException {
java.security.MessageDigest md5 = java.security.MessageDigest.getInstance("MD5");
return new String(org.apache.commons.codec.binary.Hex.encodeHex(md5.digest(str.getBytes())));
}
並按下儲存。


既然是jdbc當然要先規劃一下db schema,有三個資料表要建立,user(人員資料表)、role(角色群組表)、userrolemapping(人員角色對應表),user資料表內要有帳號(username)及密碼(password),role資料表角色代號(role_code),userrolemapping資料表帳號(username)及角色代號(role_code)對應,這裡我會建議設計一個view比較方便:
SELECT user.username, user.password, role.role_code
FROM user, role, userrolemapping
WHERE user.username = userrolemapping.username AND role.role_code= userrolemapping.role_code;
若是JPA當然就用Id囉,
SELECT user.username, user.password, role.role_code
FROM user, role, userrolemapping
WHERE user.id= userrolemapping.user_id AND role.id= userrolemapping.role_id;
啟動Glassfis並進入admin console
http://localhost:4848
- 選擇資源(Resources)--JDBC-- JDBC Connection Pool,按下新增
資源類型:javax.sql.DataSource
資料庫驅動程式供應商:這裡使用Postgresql,就選Postgresql Driver。
按下Next
- 新增JDBC資源,資源--JDBC--JDBC資源,按下新增
池名稱:剛剛建立的Pool名稱即可。
輸入完畢後按下確定。
- 新增JDBCRealm,配置--server-config--安全性--範圍,按下新建,選擇JDBCRealm,
JAAS環境:jdbcRealm,這要注意就是jdbcRealm大小寫要一模一樣。
JNDI:jdbc/test,剛剛設定的JDBC名稱。主要用於連接資料庫使用。
使用表格名稱:view table名稱。
使用者名稱欄:username
密碼欄:password
群組表格:view table名稱。
群組名稱欄:role
摘要演算法:MD5,這裡要注意一下,Default為SHA-256,並注意資料表中密碼欄位請以MD5方式儲存,參考程式如下:
public String encoderByMd5(String str) throws UnsupportedEncodingException {
java.security.MessageDigest md5 = java.security.MessageDigest.getInstance("MD5");
return new String(org.apache.commons.codec.binary.Hex.encodeHex(md5.digest(str.getBytes())));
}
並按下儲存。
- 進行Application web.xml檔案設定,Netbeans中打開web.xml(也可以直接修改啦),點選Security--Login Configuration,勾選選Form的選項
Form Login Page:輸入登入頁的路徑,請注意該頁面有幾個必要欄位,如下
Form Action:j_security_check
Form Input:j_username及j_password
Form Action:j_security_check
Form Input:j_username及j_password
Form Error Page:輸入登入失敗對應的路徑頁面。
Security Role:新增與role一樣的角色。
儲存檔案,重新啟動Glassfish,並Deploy Application,開啟Browser輸入Application網址,這時候應該不管輸入哪個網址都會redirect到Login的頁面囉。
SSO補充:
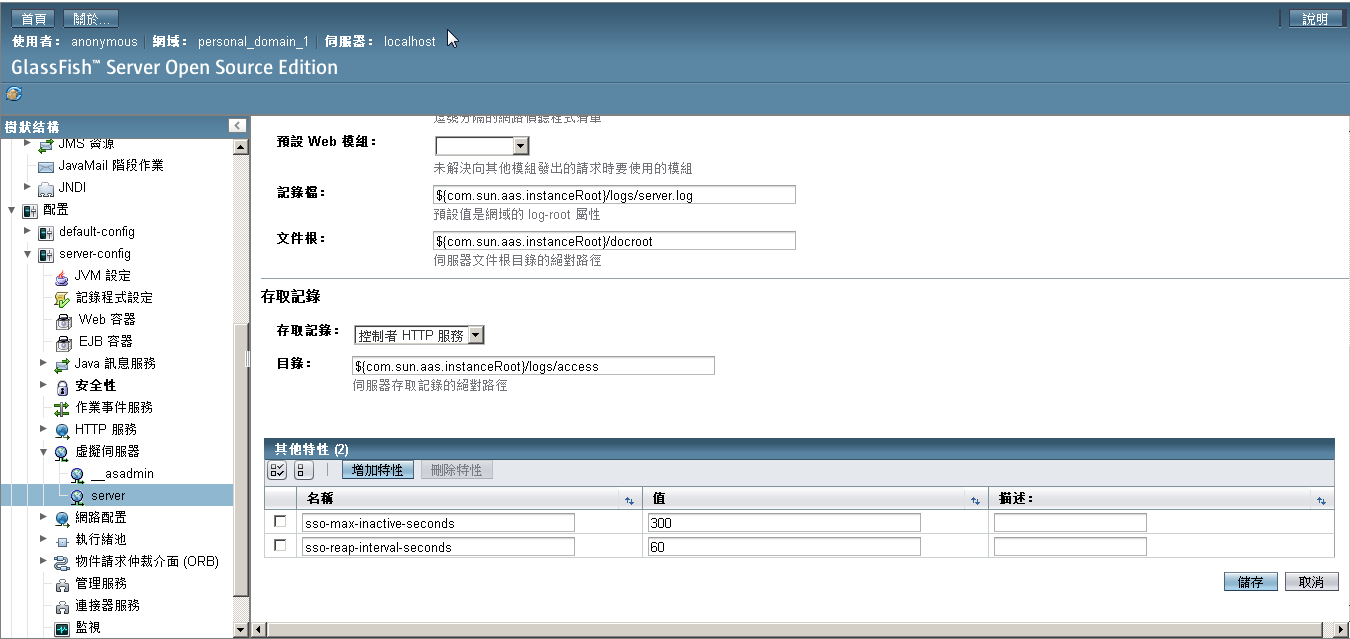
有時候會有多組Application需要access同一Realm做到SSO的情形,就可以在配置--server-config--虛擬伺服器--選擇你要SSO的Server,通常與Realm同一台,將SSO選項選擇已啟用,然後在其他特性中增加兩組特性。
sso-max-inactive-seconds:300
sso-reap-interval-seconds:60
按下儲存,重新啟動Glassfish,就可以兩組或兩組以上Application使用同一個realm,而且只要登入其中一組Application的Login頁面後,進入其他Application時就不用在登入了。
留言
張貼留言